Use VUB VPN: Difference between revisions
From IIHE Wiki
Jump to navigationJump to search
| Line 20: | Line 20: | ||
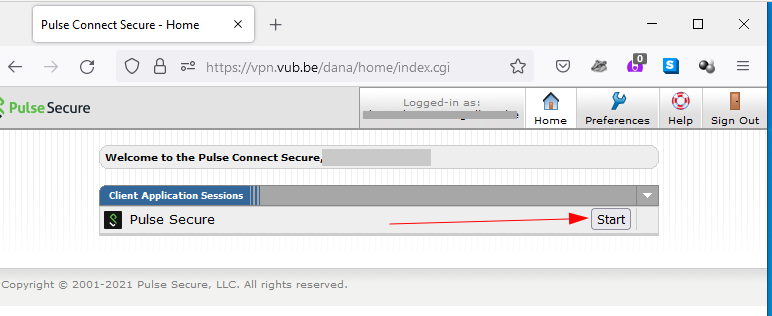
*After login click on '''start''' next on Pulse Secure in the Client Application Session list : | *After login click on '''start''' next on Pulse Secure in the Client Application Session list : | ||
[[image:vpn_vub_windows02.png]] | |||
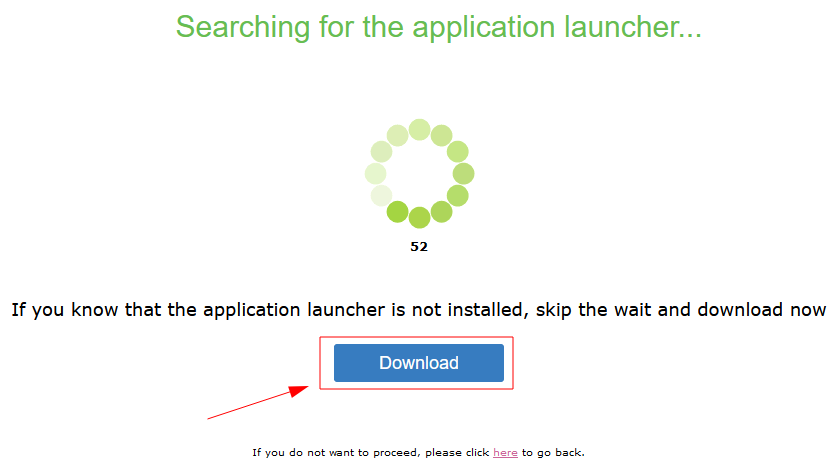
*Then click on '''Download''' : | *Then click on '''Download''' : | ||
[[image:vpn_vub_windows03.png]] | |||
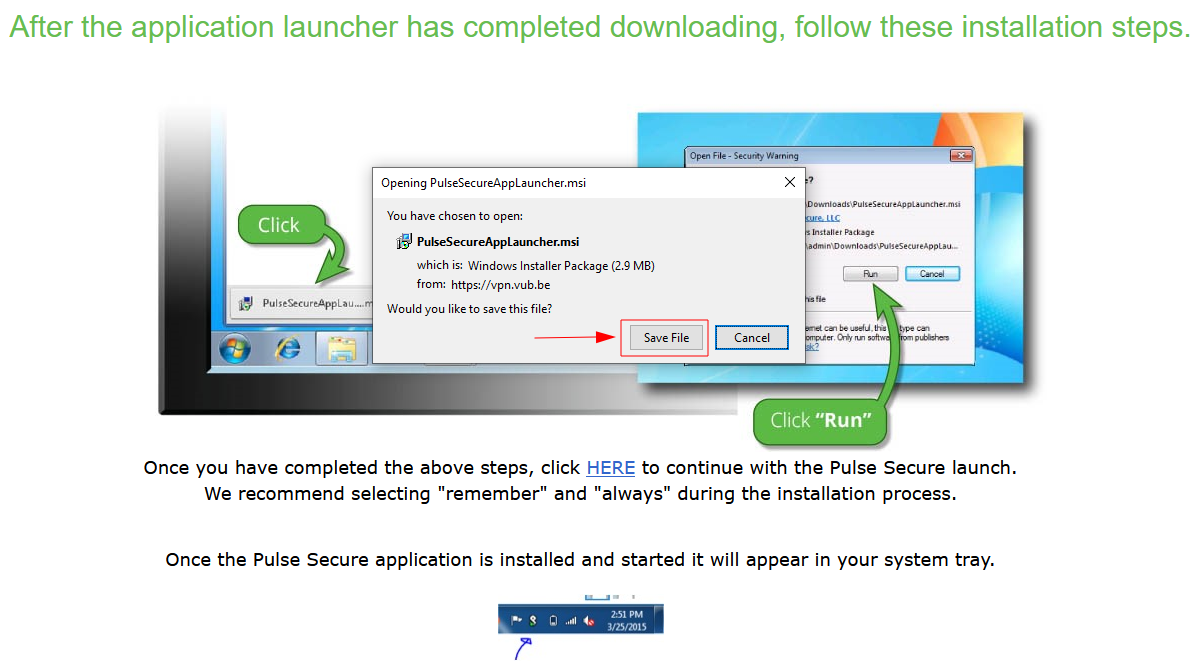
*Save the file then run it : | *Save the file then run it : | ||
[[image:vpn_vub_windows04.png]] | |||
[[image:vpn_vub_windows05.png]] | |||
[[image:vpn_vub_windows06.png]] | |||
*Then click on "HERE" on the webpage previously opened : | *Then click on "HERE" on the webpage previously opened : | ||
[[image:vpn_vub_windows07.png]] | |||
*Allow administrative rights (you can be asked multiple times about it during the install procedure): | *Allow administrative rights (you can be asked multiple times about it during the install procedure): | ||
[[image:vpn_vub_windows08.png]] | |||
*At the end you should this icon on your tray bar showing that you are now connected to the VUB VPN. | *At the end you should this icon on your tray bar showing that you are now connected to the VUB VPN. | ||
[[image:vpn_vub_windows09.png]] | |||
[[image:vpn_vub_windows10.png]] | |||
===Mac=== | ===Mac=== | ||
Revision as of 13:09, 6 December 2021
About
Most of the VUB resources require a VPN connection to access them from outside the campus, you need a VUB NetID or a VUB partner account to connect.
Connection information
- Address : https://vpn.vub.be (if you are using a partner account the address is : https://vpn.vub.be/partners)
- Login : A VUB NetID or a VUB partner account
Install the VUB VPN
Linux (Ubuntu 20 LTS)
Windows 10
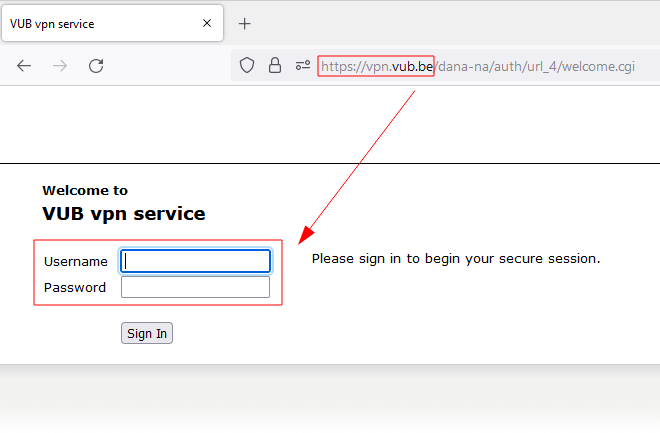
- Navigate to https://vpn.vub.be/ (or https://vpn.vub.be/partners if you have a VUB partner account)
- After login click on start next on Pulse Secure in the Client Application Session list :
- Then click on Download :
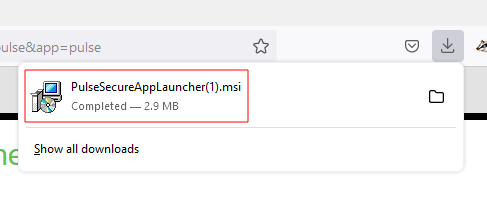
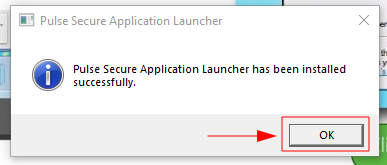
- Save the file then run it :
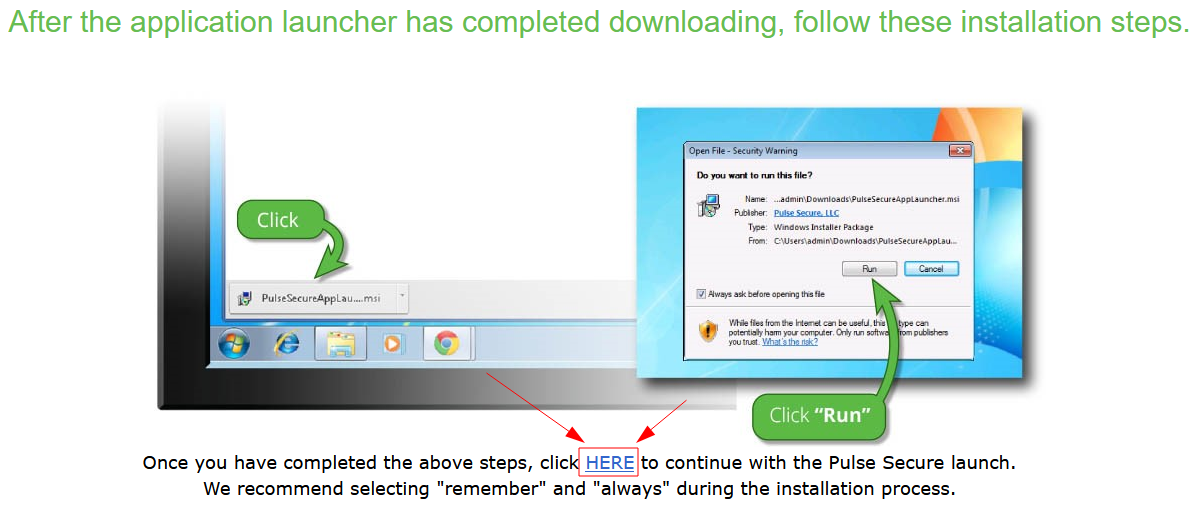
- Then click on "HERE" on the webpage previously opened :
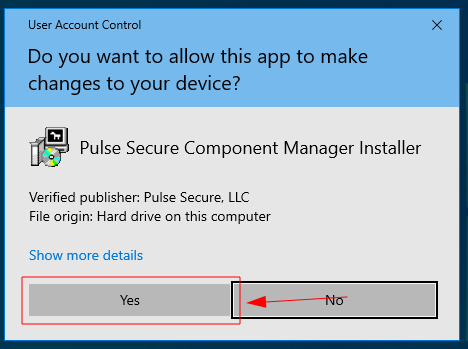
- Allow administrative rights (you can be asked multiple times about it during the install procedure):
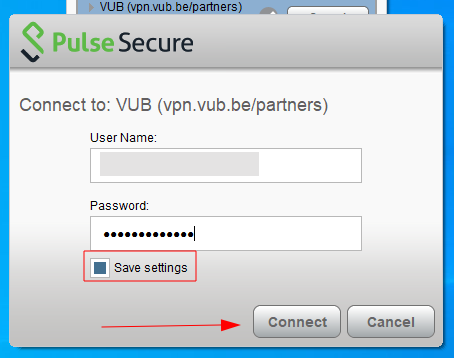
- At the end you should this icon on your tray bar showing that you are now connected to the VUB VPN.
